A campaign is comprised of several different directives, each directive tells the List Sorcerer program how to manage your campaign. When the campaign wizard completes is has created set of these directives leaving several of them in an inactive state. The reason for this is twofold, firstly it gives you an opportunity to both verify and view the contents of your newly created campaign, and secondly it allows you to make any required modifications to your new campaign prior to bringing it fully online.
The campaign wizard creates the minimum set of directives required in order to manage the majority of campaign's. The List Sorcerer program gives you the power to fully tailor your email campaigns to whatever criteria you may have through the directives that you have assigned to your campaign. If your campaign requires some additional or custom functionality then you would need to manipulate your campaigns directives.
Upon completion the campaign wizard has created the following campaign directives for you:
Each newly created campaign by default contains the following:
a default e-mail template that has been set to an inactive disabled state.
several default membership processing rules in order to handle membership activities such as members joining, members leaving, and pop3 cleanup. These are also placed in an inactive disabled state and are automatically re-enabled when select the option titled "Turn On Automatic Membership Services Handing"
A set of scheduled tasks for processing both inbound member services and outbound campaign email activities, by default both these scheduled tasks are in an active enabled state.
Below are the 3 steps involved to properly activate your campaign.
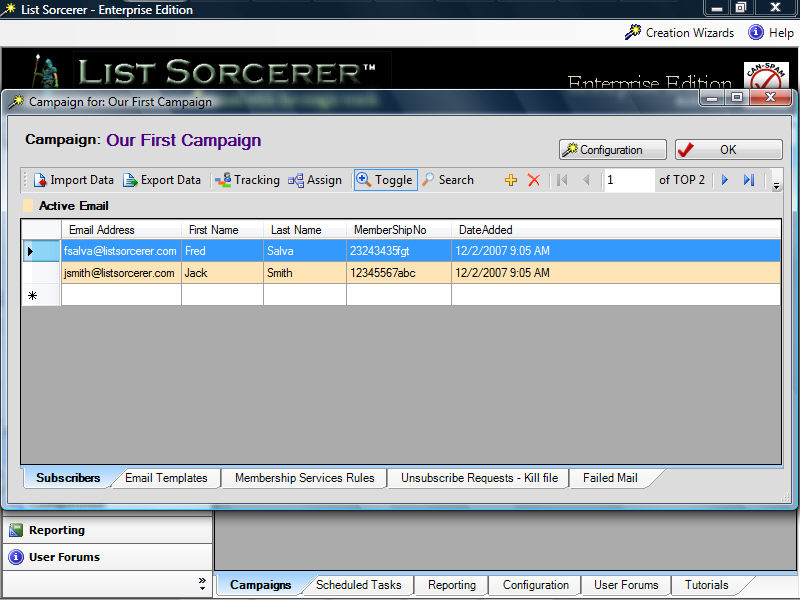
Step 1/3 - Open up you new Campaign
The figure below shows you what a typical campaign might look like, you can open any campaign by double clicking on its name from within the main programs "Campaigns" tab or by selecting the "Modify Selected Campaign" option from within the left Campaigns navigation pane.. We have manually added a couple lines of data to this new campaign so that we would have something to test with when personalizing our email. You might also want to manually add some test data to your new campaign as well.
Step 2/3 - Modify the default Email Template
Select the "Email Templates" tab of your campaign. Then double click on the email template called "Default Email Template". Within the email template below we added a "From Display Name", and changed the default message. We also personalized our default message to include some dynamic text from our database using the "Insert Dynamic data from list" tool bar item from within the e-mail editor. It is always a good idea to send yourself a test email using the "Send Test Message" option of the e-mail editor.
Upon completing your modifications change the "Status within Campaign" to "enabled" and then select the "OK" button to save your changes.
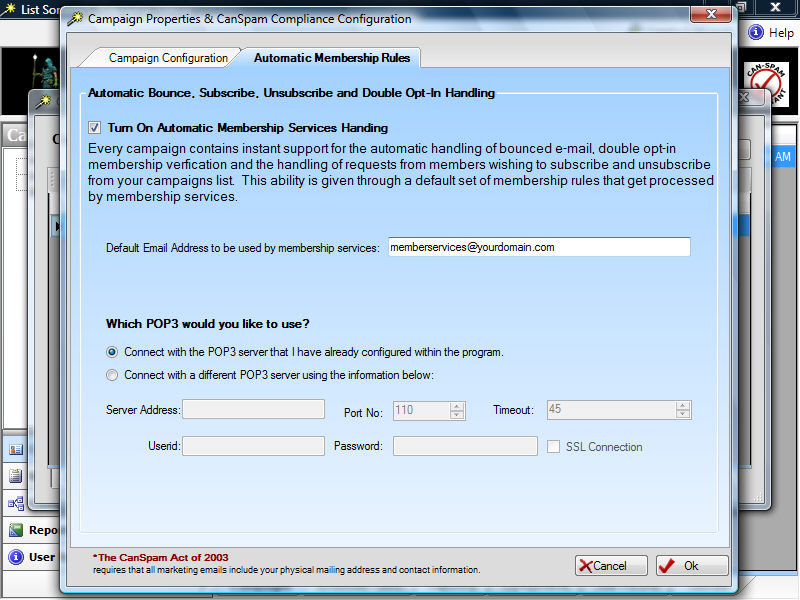
Step 3/3 - Turn On Automatic Membership Services Handling
When the "Turn On Automatic Membership Services Handling" option has been selected List Sorcerer will automatically integrate support for member related services such as new members joining, members leaving etc. In essence when this option has been enabled it will in-turn put the campaigns default membership services rules into an enabled state. If you don't wish to enable the entire set of default system membership services rules then you may manually enable or disable at will, if the systems default membership services rules do not fit the criteria of your campaign then you may create additional ones. Modifications and additions to your campaigns membership services rules are made from within the campaigns "Membership Services Rules" tab.
Congratulations! your new campaign is now fully operational. You may at any time make modifications to the timing of when your campaigns tasks are run by modifying the respective scheduled task from within the Scheduled Tasks tab of the list sorcerer enterprise main program window. You may obtain more detailed information about scheduled tasks by referring to the topic title Scheduled Tasks