All events within your campaigns are driven through the use of scheduled tasks, there are two types of scheduled tasks.
the first type of scheduled task processes outbound events such as your campaign's outbound e-mail templates.
the second type of scheduled task processes inbound events such as double opt-in member verifications, members joining, members leaving etc.
Each scheduled task is bound to a specific campaign, and in doing this can have its own criteria that is specific to that one campaign, in addition you may have multiple scheduled tasks bound to the same one campaign. Each scheduled task can be setup to view the entire contents of a campaign or just a small portion based upon a SQL filter and other criteria that you can specify. In setting up scheduled tasks in this manner it is easily possible to have special events that are triggered by special factors within your campaign. An example of this might be a birthday e-mail that you wished to be sent out on your members birthday, or perhaps another e-mail advising members of a their membership coming up for renewal. All of these special tasks can be easily setup within list sorcerer by setting up additional scheduled tasks while still having your campaign's main scheduled task keeping the bulk activities of your campaign operational. Please note that only e-mail templates that are in an active state will be included when your campaign is processed by a scheduled task.
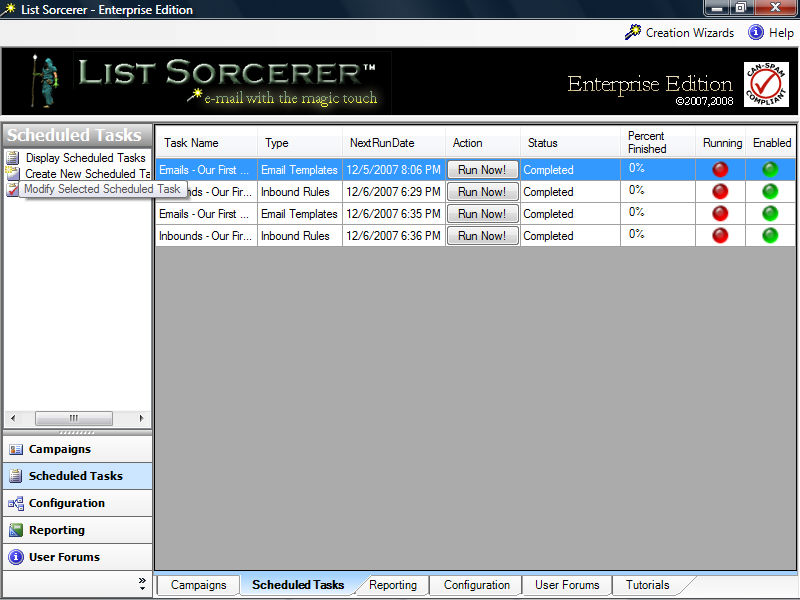
Shown within the screen below are some scheduled tasks, notice that both inbound and e-mail templates( outbound ) task types are listed.
Scheduled task additions and modifications can be made by selecting the appropriate action from within the left hand pane. Upon which the scheduled task creation/modification wizard will be launched.
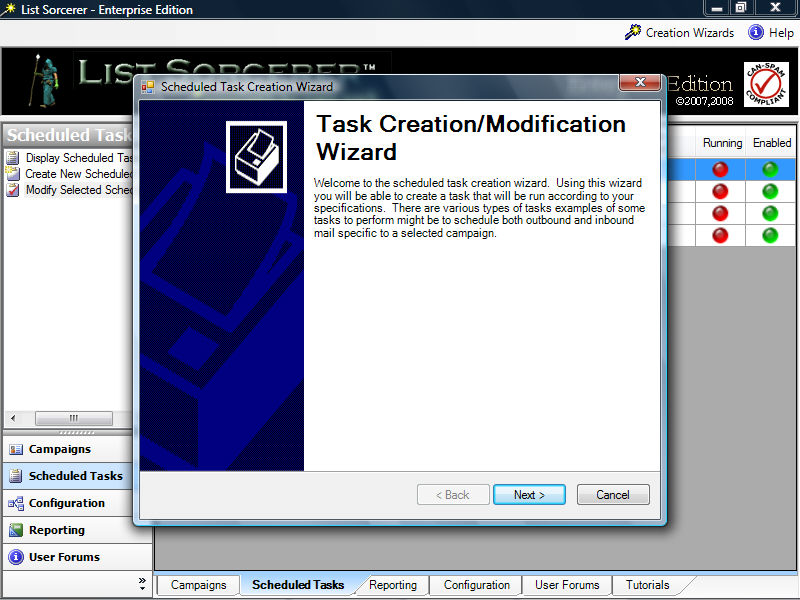
Step 1/6 - Scheduled Task Creation/Modification Wizard
The initial screen within the scheduled task creation/modification wizard as shown below simply acts as an introduction to the wizard.
The scheduled task creation/modification wizard will guide you through setting up or making modifications to an existing scheduled task with just a few simple steps.
Click the "Next Button located within the lower right hand corner of the wizard to continue
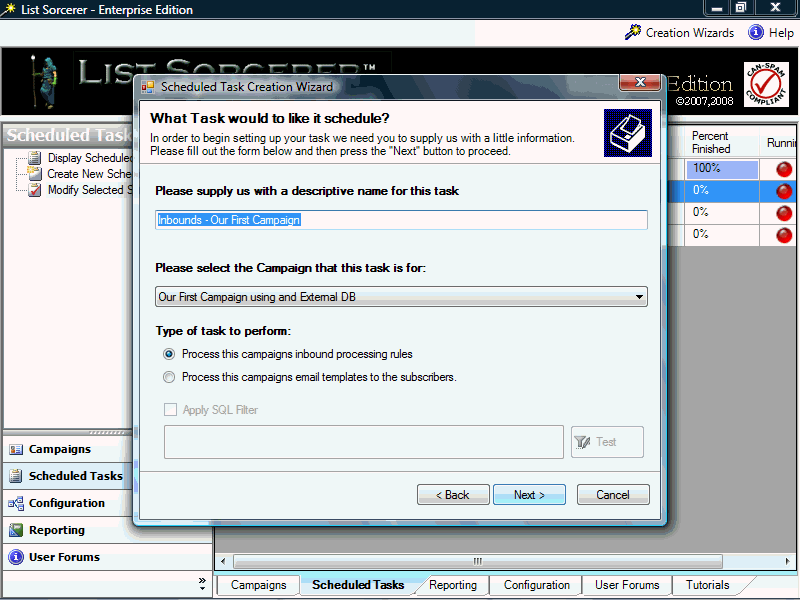
Step 2/6 - Scheduled Task Creation/Modification Wizard
The next step is to give the wizard a name for your new scheduled task, Upon doing this select the campaign that this task is to manage from the drop down below and lastly tell the wizard what type of task it is to perform. If your scheduled task type is to process your campaigns outbound e-mail templates and you only wish to target a subset of your campaign data then you would probably also want to specify a SQL filter in which case you would also select the "Apply SQL Filter" option.
Click the "Next Button located within the lower right hand corner of the wizard to continue
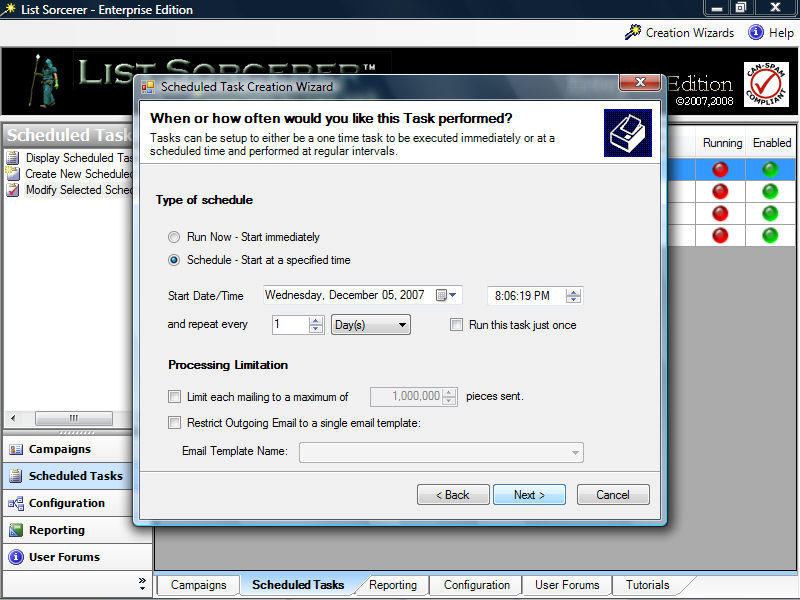
Step 3/6 - Scheduled Task Creation/Modification Wizard
The next piece of information that the scheduled task creation/modification wizard needs to know is when to run your task, how often and whether you want to place any restrictions or limitations on the amount of pieces that get processed and lastly in the case of outbound tasks whether this task pertains to a particular e-mail template within the campaign.
Click the "Next Button located within the lower right hand corner of the wizard to continue
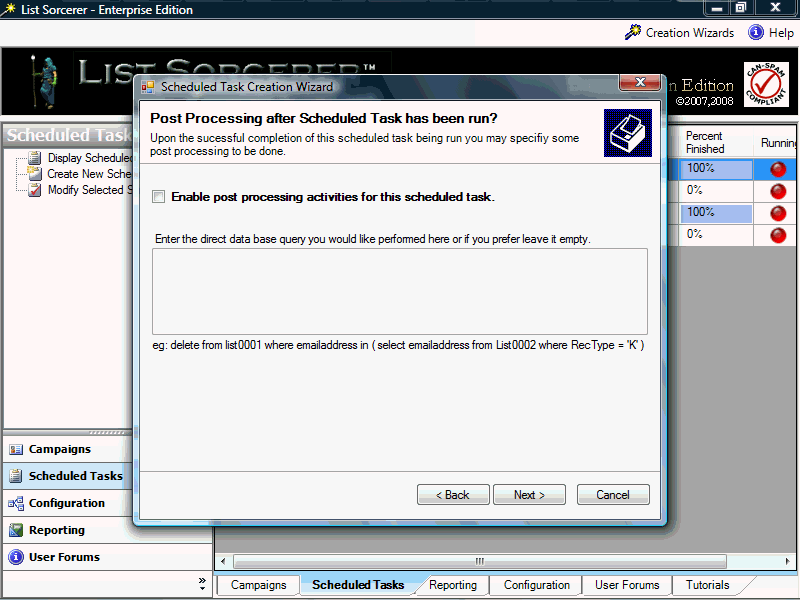
Step 4/6 - Scheduled Task Creation/Modification Wizard
This is the second last step within the scheduled task creation wizard. Within this wizard step you will be able to configure a SQL query that will be run upon the completed of the this scheduled task. This SQL Query that you specify here will be run using your campaigns lists database connection. You might decide to use a scheduled task to perform such functions as removing newly added removal requests to this campaign from other campaigns as well.
Click the "Next Button located within the lower right hand corner of the wizard to continue
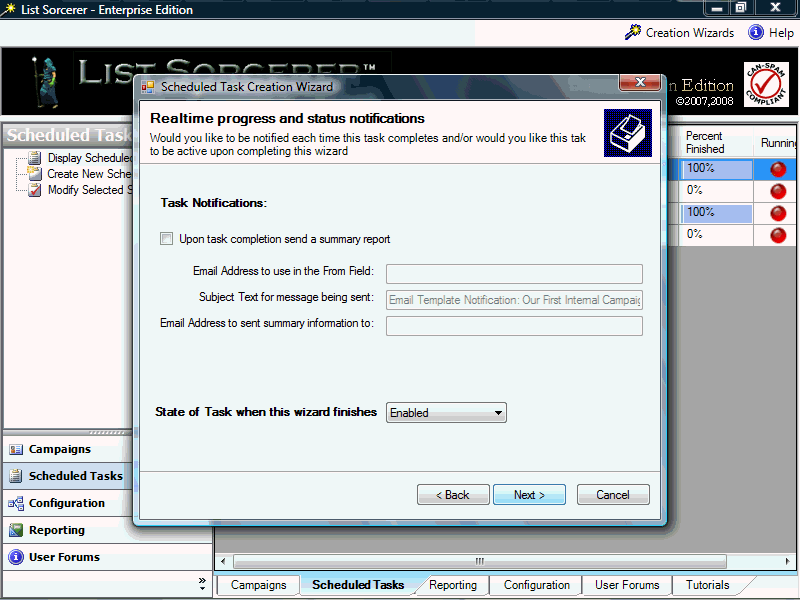
Step 5/6 - Scheduled Task Creation/Modification Wizard
This is the last step within the wizard, if you would like to be notified in real-time of a tasks completion and its status via e-mail then you would specify this within this step which is displayed below. Remember that you may also enable or disable the status of scheduled tasks from running by changing the status of the task.
Click
the "Next Button located within the lower right hand corner of the
wizard to continue
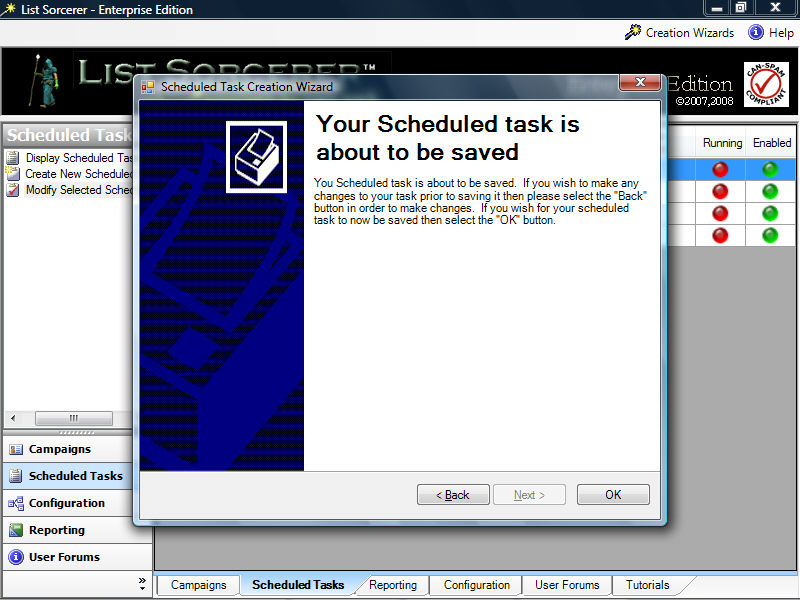
Step 6/6 - Scheduled Task Creation/Modification Wizard
Upon selecting the "OK" button the scheduled task and any changes made to it will be saved. If you wish to make any changes prior to selecting the "OK" button you may do so using the "Back" button. When you are sure you are satisfied with the configuration of your scheduled task you may select the "OK" button in order to save your changes and then exit the wizard. If you wish to cancel the wizard without saving your changes then simply selecting the "Back" button followed by the "Cancel" button.
Click
the "Next Button located within the lower right hand corner of the
wizard to continue